Showing posts with label Ben Matthews. Show all posts

Saturday, 5 December 2015

Ben Matthews - Environment Artist. My Documentation. Bibliography.

Texture and Image References

-          4770x3178, Stone. 'High Resolution Textures: October 2014'. Seamless-pixels.blogspot.co.uk. N.p., 2015. Web. 12 Nov. 2015.
-          Canstockphoto.com,. 'Footprint Clipart And Stock Illustrations. 8,154 Footprint Vector EPS Illustrations And Drawings Available To Search From Thousands Of Royalty Free Clip Art Graphic Designers.'. N.p., 2015. Web. 25 Nov. 2015.
-          Decorcamp.com,. 'Textures >> Wood >> Flooring Parquet#36 Wood Floor Texture - Decorcamp.Com'. N.p., 2015. Web. 17 Nov. 2015.
-          Etsy,. 'Items Similar To December 8, 1918 - German Newspaper - WWI - World War One Amazing! On Etsy'. N.p., 2015. Web. 16 Nov. 2015.
-          Flickr - Photo Sharing!,. 'Old Clock'. N.p., 2015. Web. 22 Nov. 2015.
-          Gamebanana.com,. '2048² Aged Wood Panel Floor (Devhub > Gamebanana > Textures > Wood) - GAMEBANANA'. N.p., 2012. Web. 24 Nov. 2015.
-          Invaluable.com,. 'Lucian Zabel Works On Sale At Auction & Biography | Invaluable'. N.p., 2015. Web. 16 Nov. 2015.
-          Ivangraphics.deviantart.com,. 'Tree Bark - Texture, Pattern'. N.p., 2015. Web. 24 Nov. 2015.
-          Legacyinspections.com,. 'Legacy Inspections'. N.p., 2007. Web. 23 Nov. 2015.
-          Mb3d.co.uk,. 'Metal Rusty And Patterned Seamless And Tileable High Res Textures'. N.p., 2015. Web. 16 Nov. 2015.
-          Mb3d.co.uk,. 'Plaster Seamless And Tileable High Res Textures'. N.p., 2015. Web. 24 Nov. 2015.
-          Minaco-uk.com,. 'N/A.'. N.p., 2015. Web. 24 Nov. 2015.
-          Mindmillion.com,. 'Gold Textures, Gold Fill, Gold Seamless Background 3'. N.p., 2015. Web. 17 Nov. 2015.
-          N/A., Andy. '30+ Stone Texture Examples - Designrouge.Com'. designrouge.com. N.p., 2013. Web. 23 Nov. 2015.
-          N/A.,. 'N/A.'. N.p., 2015. Web. 23 Nov. 2015.
-          Profilm.de,. Web. 16 Nov. 2015.
-          Salvomie.com,. 'Salvomie : Reusable Metals > Wants - Page 1'. N.p., 2011. Web. 23 Nov. 2015.
-          Sites.google.com,. 'WW1 German Propaganda #3 (Deutsch Propaganda #Drei) - Hannah & Adrian's Wiki'. Web. 16 Nov. 2015.
-          TextureX,. 'Free Wood Textures Wood Grain Texture Table Surface Brown Stock Photo Design'. N.p., 2015. Web. 23 Nov. 2015.

-          tileable, Rough. 'High Resolution Textures: Rough Stucco White Dirty Paint Streaky Plaster Fine Detail Wall April 2014 Texture Seamless Tileable'. Seamless-pixels.blogspot.co.uk. N.p., 2015. Web. 16 Nov. 2015.

Ben Matthews - Environment Artist. My Documentation. Level Tri Count.

For this project We were given a tri count limit of 100,000 tris. I counted up the number of objects in the Unity Scene using the Hierarchy and added up their total tris. I did this to ensure a 100% accurate tri count. And to make sure I meet the hand in requirements.

The More We Know: The Price of Knowledge. Level Tri Count.

Bookshelf Open Cupboard, Broken Shelf. 413 tris x 32 = 13,216 tris.

Bookcase with Book Texture. 240 tris x 31 = 7,440 tris.

Tall Pillar. 80 tris x 12 = 960 tris.

Short Pillar. 80 tris x 18 = 1,440 tris.

Large Safe. 194 tris x 1 = 194 tris.

Window. 136 tris x 20 = 2,720 tris.

Main Entrance Counter. 56 tris x 1 = 56 tris.

Key Rack. 660 tris x 1 = 660 tris.

Main Entrance. 626 tris x 1 = 626 tris.

Banister Upper Straight. 934 tris x 2 = 1,868 tris.

Banister Upper Left. 1,472 tris x 2 = 2,944 tris.

Banister Stairs. 1,111 tris x 2 = 2,222 tris.

Stair Joining Piece. 2 tris x 1 = tris.

Straight Stairs Short. 208 tris x 1 = 208 tris.

Straight Stairs Long. 256 tris x 2 = 512 tris.

Inner Wall Supports. 288 tris x 1 = 288 tris.

Tower Window. 262 tris x 2 = 524 tris.

Tower Banister. 778 tris x 1 = 778 tris.

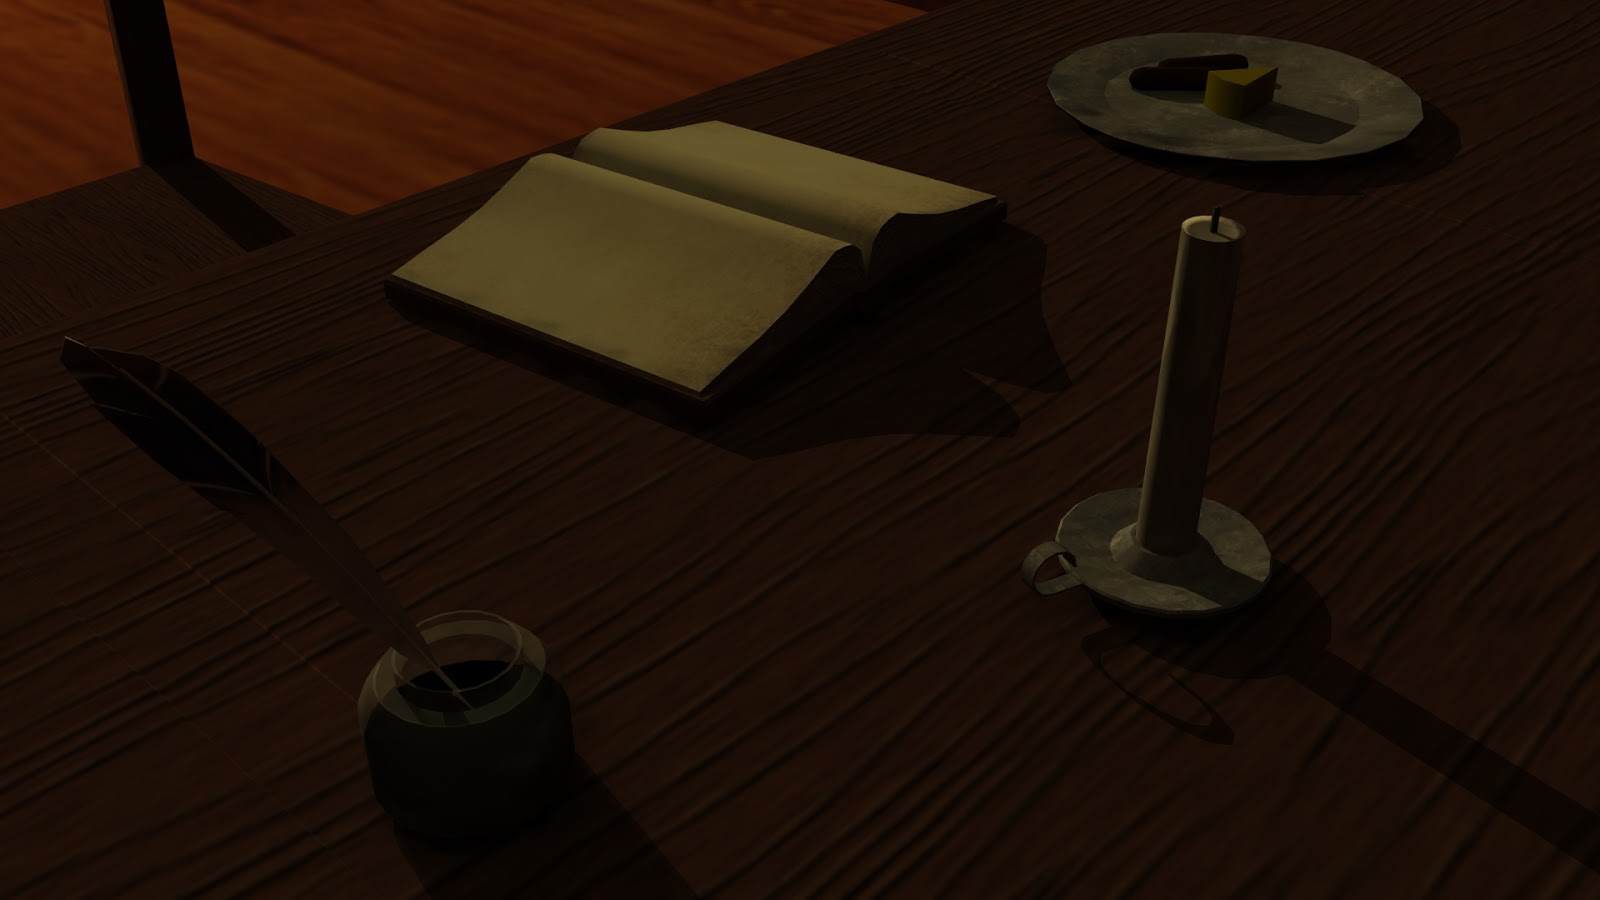
Large Desk. 2078 tris x 1 = 2078 tris.

Plate with Food. 420 tris x 1 = 420 tris.

Chair 1. 730 tris x 1 = 730 tris.

Logs. 12 tris x 41 = 492 tris.

Single Door. 736 tris x 6 = 4,416 tris.

Double Door. 1004 tris x 2 = 2,008 tris.

Chair 2. 224 tris x 44 = 9,856 tris.

Library Walls, Floor, Roof with Materials. 2,276 tris x 1 = 2,276 tris.

Table. 590 tris x 14 = 8,260 tris.

Small Round Table. 192 tris x 4 = 2,360 tris.

Fireplace. 312 x 1 = 312 tris.

Fireplace Metal. 560 x 1 = 560 tris.

Log Burnt. 12 tris x 3 = 36 tris.

Gas Lamp Wall. 172 tris x 12 = 2,064 tris.

Poster 1. 2 tris x 8 = 16 tris.

Poster 2. 2 tris x 1 = 2 tris.

Book Row. 92 tris x 91 = 8,372 tris.

Book Stand. 118 tris x 1 = 118 tris.

Book Open. 200 tris x 10 = 2,000 tris.

Book Dark Blue. 144 tris x 7 = 1,008 tris.

Book Blue. 144 tris x 1 = 144 tris.

Book Brown. 144 tris x 2 = 288 tris.

Book Brown Leather 1. 144 tris x 1 = 144 tris.

Book Brown Leather 2. 144 tris x 2 = 288 tris.

Book Black Leather. 144 tris x 4 = 576 tris.

Book Green. 144 tris x 7 = 1,008 tris.

Book Purple. 144 tris x 1 = 144 tris.

Book Maroon. 144 tris x 5 = 720 tris.

Large Painting. 244 tris x 3 = 732 tris.

Rug. 2 tris x 2 = 4 tris.

Rug 2. 2 tris x 2 = 4 tris.

Beer Glass. 294 tris x 2 = 588 tris.

Quill With Feather. 980 tris x 3 = 2940 tris.

Lantern. 454 tris x 1 = 454 tris.

Candle With Holder. 700 tris x 1 = 700 tris.

Key Silver. 224 tris x 3 = 672 tris.

Crate. 88 tris x 21 = 1,848 tris.

Key Gold. 148 tris x 2 = 296 tris.

Ground Plane. 2 tris x 1 = 2 tris.

Small House. 20 tris x 12 = 240 tris.

Block Lighting Bias. 36 tris x 1 = 36 tris.  After Alterations in Unity – 84 tris.

Lab Set. 2994 tris x 1 = 2994 tris.

Gas Jar. 144 tris x 5 = 720 tris.

Lever. 188 tris x 1 = 188 tris.

Total: 99,820 tris.


Ben Matthews - Environment Artist. Finishing off the Level in Maya/ Unity.

Once I had finished building all of the textured parts for the level I began exporting them individually as FBX files with the media embedded. I exported them directly into the assets folder of a new unity scene which I had open.


You can see here how I made everything once.
I made everything once with the intention of exporting the objects from Maya to Unity and then duplicating them around the Unity scene. I will fully build the level within Unity.


I placed all of the objects into Unity and constructed the level.


I decided to tidy up the Hierarchy in Unity by grouping the assets together. This allows Me to keep track of the number of objects within the scene. 


I tidied up the scene and applied finishing touches to the level. This included lighting and adding mesh colliders to all of the objects in the level. I did this to ensure the player doesn't clip through objects in the world. The lighting also helps to create atmosphere and set the scene.

I made all of the library walls, floors and ceilings two sided to stop light pouring in. This will create nice crisp shadows around the windows and build upon the atmosphere.


When I turned the faces two sided I noticed thin white lines of light seeping through the mesh. To solve this I edited the lighting bias. I also placed a long thin block across the edges where the floor and walls meet. I did this to block any remaining light from breaking through the edges of the mesh.


I then added in Fog along with a ground outside and external buildings. I also changed the Sky Box from Unity's default Sky box to a simple Gray Lambert. This really added to the fog and removed any hint of a horizon. It now appears like an extremely overcast day. It also builds upon the atmosphere and premise of the story line. It is a ghostly, barren world. Was this caused by war? Or is it symbolic of the characters death? I wanted to leave that for the player to decide.

I then went back through all files that I will submit to make sure they are well organised.

For example:


I reorganized all of the objects within the scene into corresponding groups that make it easy to find individual assets within the Maya file.

This was the final step in the construction of this level. It was now ready to hand over to the game designer.

Final Screenshots.


Tuesday, 17 November 2015

Ben Matthews - Environment Artist. Texturing Assets.

In this post I will cover My method of texturing all assets for the level. This includes the level itself. All textures within this game are 2048 x 2048 pixels in size, otherwise known as (2K).

I will be demonstrating how I texture objects using a set of stairs.

The first step is to UV unwrap the object You want to texture. I did this by Planar Mapping specific groups of faces at a time. I then laid out the UV Shells in the 0-1 space in the UV Editor. I used the checkers to make sure the UV's were to a correct scale. Then I saved out a UV Snapshot.


I took this UV Snapshot into Photoshop where I began to edit it.


Using images I gathered from public sources I created textures which I edited to suit My needs.


I overlaid these images over the texture sheet to correspond with the UV's. The top of the UV snapshot is occupied by the stairs. The bottom of the Snapshot is occupied by the sides and rear of the staircase.


I placed the wooden planks over the stairs and the red carpet on top. The sides of the staircase are just the wallpaper that I intend to use for the entire library.


I saved the image out of Photoshop as a jpeg and applied it to the material on the staircase. As We are limited to using solely diffuse maps this completes the texturing process.


I carried on texturing all of the objects within the scene. This includes assets.

Here are some more examples of Textured Objects and a small sample of Texture Sheets that I have created for this project. The majority of textures I have used started off as an image taken from the internet, or photo's I have taken myself. However I heavily edited a vast majority of them using filters and deformation tools in Photoshop such as Warp. I even painted over a few of them myself. This was in an effort to avoid Plagiarism. I will reference all the images I used at the end of this project.


I did also use Seamless Textures that I created myself using the Offset Tool in Photoshop.

A seamless texture, created using photo manipulation and digital painting.
This seamless texture makes up the muddy floor outside. I tiled it 10 times across a large plane to create the illusion of one huge texture.

I did also create my own artwork for use in game outside of textures.

I haven't tried my hand at concept art for a while now so I thought id use this as an opportunity to create some.

Before this course I used to be a Photographer so luckily for Me I have a large back catalog of images to use in artwork. I have recently started learning about a technique called Photo Bashing. Photo Bashing is when an artist creates a scene by combining together multiple images at once. I decided to create some paintings to place within the environment using Photo Bashing.


Painting 1.


Painting 2.


Painting 3.


You can see here how I combined images together to create a piece of artwork to place onto the paintings in game. I tried to create paintings that were relevant to the period of time this game is set in. For example, Germany prided itself on its explorers at the time. So it would make sense for the paintings to be of explorers/ exploring.

This was a nice exercise that helped challenge Me in an area other than 3D modeling.


Friday, 13 November 2015

Ben Matthews - Environment Artist. Lowering the Tri Count/ Mesh Optimization.

Within this post I will demonstrate the process I used to reduce the tri count on My low poly level. this is extremely important as i'm limited to a total budget of 100,000 tris, this includes assets. It is also a good habit to get into as reducing the number of tris lowers the impact the mesh has on a PC's performance. This creates a smoother and more enjoyable experience for the player.

This is something I will repeat for all objects within the scene.  

I selected and isolated the ground level.


I then selected all of the faces that will make up the floor and extracted them. This separates the floor from the walls. This will make it easier for Me to texture the level.


546 tris.
Once the floor was separated I selected all of the non crucial edges. These are edges that don't create or hold the shape of the floor.


Holding Control I deleted the edges. Both the edges and the vertices connected to them have now been deleted.


I then straightened the remaining edges by holding the V key and snapping the vertices in line with each other. Leaving Me with a neat and tidy, low poly mesh.

136 tris.
Alternately I could of deleted the floor and replaced it with a single plane like the one below. I adjusted the edge loops on this plane to match the walls of the lower level. I did this so that if I chose to use this plane instead of the already existing floor, I would be able to see an outline of the walls and floor when I saved it as a UV snapshot. This would allow Me to texture one room at a time.


I repeated this process with the walls then placed the floor back in as a separate object. Leaving Me with a much neater topology than before.

The finished result.
I later merged a number a vertices together using the target weld tool, this created triangles across my mesh. However triangles aren't a problem if your only applying diffuse maps and not taking the mesh into a program such as Z Brush.

Using the target weld tool helped Me to reduce the tri count even further without changing the shape of the objects I was optimizing.